របៀបបង្ហាញ ឬបន្ថែម Graphics នៅក្នុង Dev C++
Dev c++ needs graphics.h header file to provide graphics capability to computers. Graphics is really outdated and like from 20+ years ago. Modern 64-bit computers do not support it anymore.
During the MS-DOS era, it was popular and utilized by many programs. Although, whoever is new to graphics can still learn a lot with the graphics.h library and build the basic foundation of modern graphics.
There are more complicated but better libraries than graphics.h. To name a few –
- OpenGL
- DirectX
- SDL
- SFML
- Allegro
If you are struggling to configure graphics in dev C++ this tutorial will explain in step by step how to add graphics in dev C++.
How to add graphics in dev C++ (follow these steps)
Step 1: Download/update the latest version of dev C++
It’s a good idea to have the latest version of the Dev C++ application. With the updated version you will likely receive new features, a lesser number of bugs along security patches.
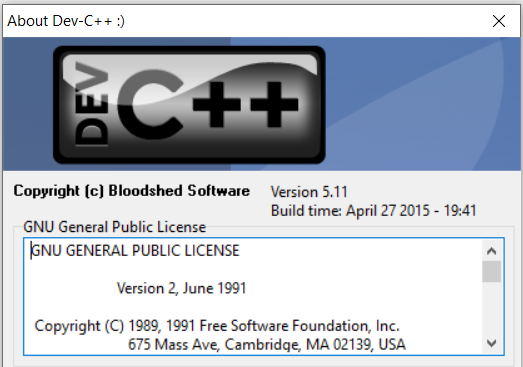
Go ahead and download the latest build of dev C++. I’m using version 5.11 while creating this article. You might get an upgrade but the procedure remains the same. You can check your dev c++ version by selecting “help” from the top menu and then selecting “About Dev C++“
Step 2: Add header source files into Dev C++ directory
Next, you need to download graphics library files and add them to the appropriate folders under the MinGW64 directory. Follow this –
- First download the header files from this Google drive link and extract the files.
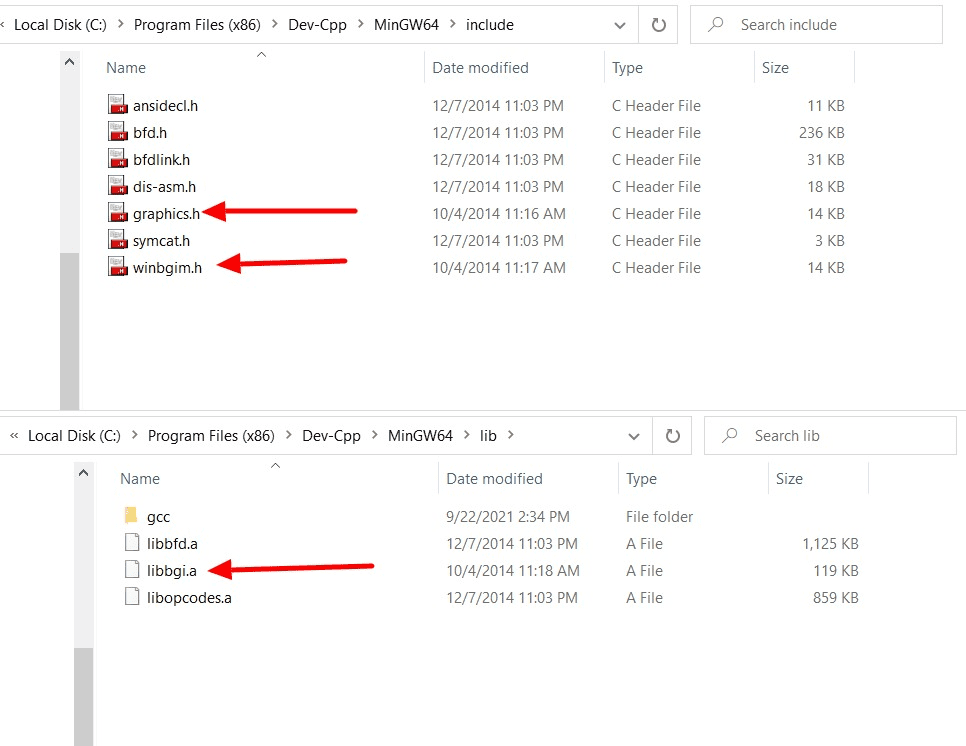
- It contains three files graphics.h, winbgim.h and libbgi.a.
- You need to copy “graphics.h” and “winbgim.h” into
includedirectory of Dev-Cpp program resource files. The exact directory address is –C:\Program Files (x86)\Dev-Cpp\MinGW64\include
- Next, copy “libbgi.a” to
libfolder which should be insideMinGW64. Directory address is –C:\Program Files (x86)\Dev-Cpp\MinGW64\lib
Double-check the include and lib folders have these files to proceed to the next step.
Step 3: Change compiler suit in Dev C++
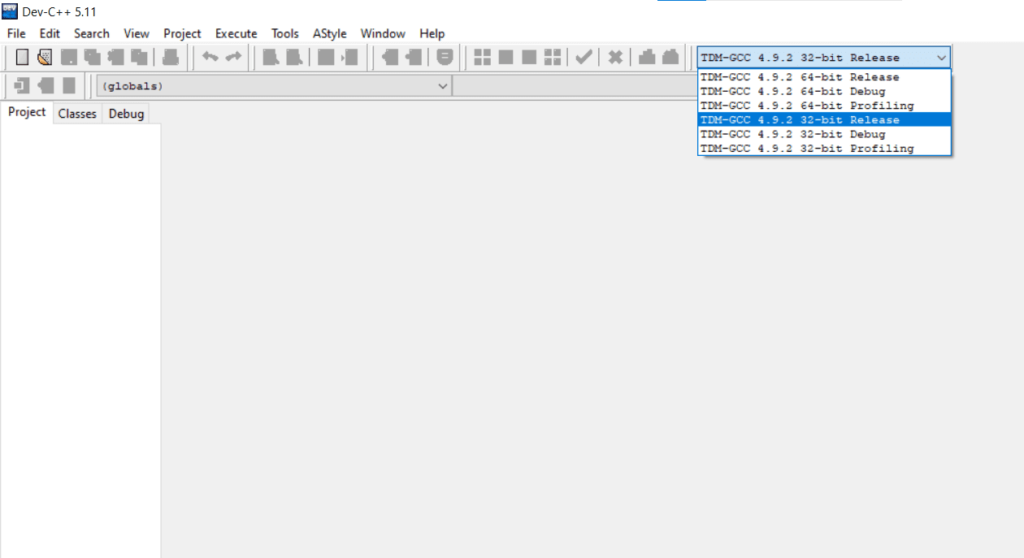
Compiler suites combine the latest stable release of the GCC toolset and open-source MinGW runtime APIs to build an open-source alternative to Microsoft’s compiler. You need to set the TDM – GCC version to 4.9.2 32-bit release.
- First open Dev C++ appliaction.
- At right most side of the toolbar you will have the drop-down menu to select desired compiler suit.
- Set it to
TDM - GCC 4.9.2 32-bit release.
Step 4: Configure required linkers for graphics
Configuring linkers is a vital step, this program will help to link object modules of a program into a single object file. For graphics.h setup you will need these linkers to be set for the selected compiler suite, aka TDM – GCC 4.9.2 32-bit release.
Steps to configure graphics.h linkers:
- On Dev C++ look for the Tool option on the top menu.
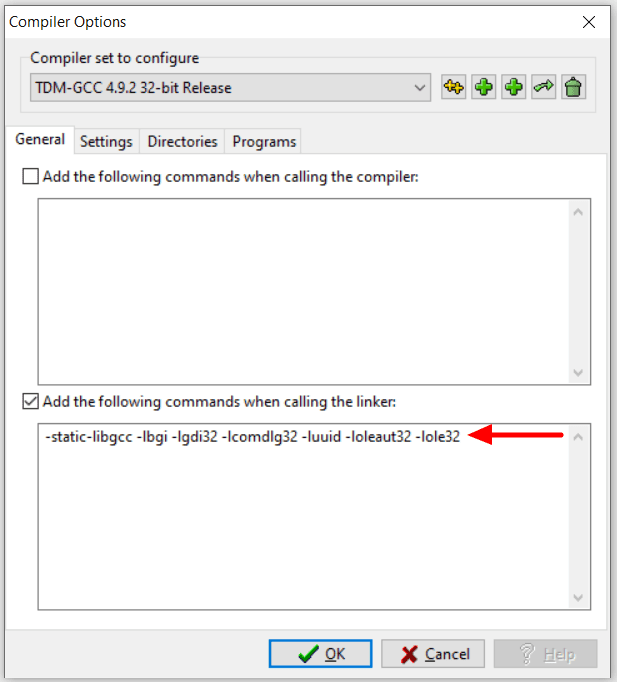
- Expand tools and select Compiler Options.
- You should arive on the general tab of compiler options window.
- Ensure “Add the following commands when calling the linker” check box is selected.
- Then add these linkers in the input box – (just copy and paste this line)
- -libgcc -lbgi -lgdi32 -lcomdlg32 -luuid -loleaut32 -lole32
- Then click on OK to save.
When complete you are ready to use graphics.h header in your c or c++ programs.
Step 5: Verify whether graphics.h header is working (optional)
Create a new source file and write a program to test graphics.h header. You can try with anything you want, for example, I’m trying to print GANA (in the Hindi language) using basic graphics output primitives…
#include<stdio.h>
#include<conio.h>
#include<graphics.h>
#include<dos.h>
main()
{
    int gd=DETECT,gm;
    initgraph(&gd,&gm,"c:\\tc\\bgi");
    setbkcolor(9);
    line(130,100,290,100);

    line(165,100,165,155);
    arc(150,155,100,0,15);
    line(180,100,180,170);
	line(190,100,190,170);

    circle(220,140,10);
    line(220,130,255,130);
    line(255,100,255,170);
    line(265,100,265,170);

    getch();
}
And here’s the output:
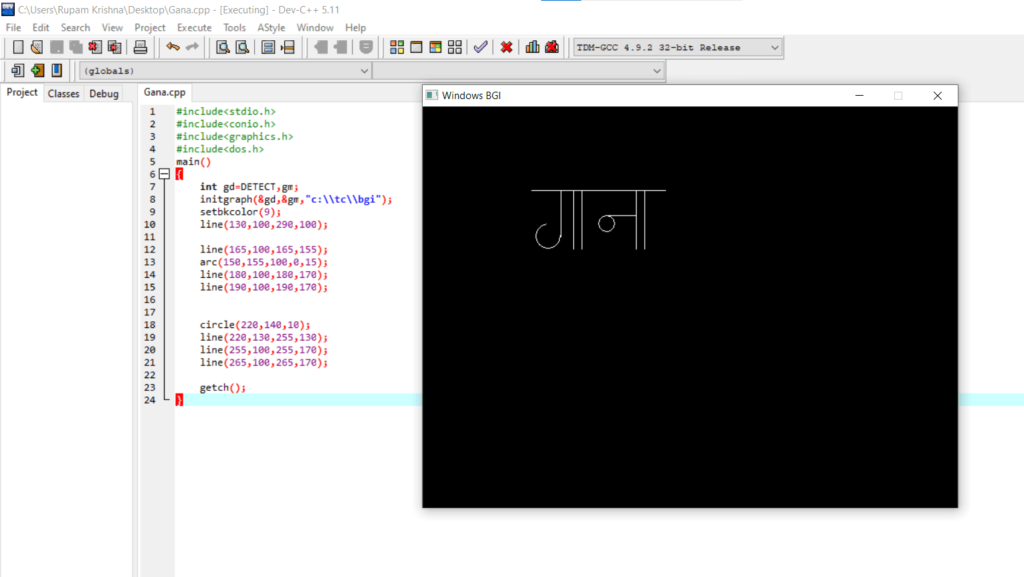
Still unable to add graphics in Dev C++?
Eventually following this guide should get your graphics.h header work with the Dev C++ application. If you haven’t followed the process thoroughly to avoid skipping steps… or if that’s not the case, then probably uninstall any previous version of Dev C++ and have the latest build. Then follow these steps again.


