

How to Create Multiple User Authentication in Laravel 9 App
Follow the following steps to create multiple user role based authentication system in laravel 9 apps; is as follows:
- Step 1: Install Laravel 9 App
- Step 2: Connecting App to Database
- Step 3: Setting up migration and model
- Step 4: Create Middleware and Setting up
- Step 5: Define Route
- Step 6: Create Methods in Controller
- Step 7: Create Blade View
- Step 8: Update LoginController
- Step 9: Create Seeder
- Step 10: Start Development Server
Step 1: Install Laravel 9 App
Open the terminal and execute the below command to download the laravel fresh setup on your system:
composer create-project --prefer-dist laravel/laravel LaraMulti
Step 2: Connecting App to Database
After successfully download laravel Application, Go to your project .env file and set up database credential:
  DB_CONNECTION=mysql
  DB_HOST=127.0.0.1
  DB_PORT=3306
  DB_DATABASE=here your database name here
  DB_USERNAME=here database username here
  DB_PASSWORD=here database password here
Step 3: Setting up migration and model
Next, add is_admin column in the users table using mirgration file. So, Open the creates_users_table.php migration file, which is placed on Database/migration and update the following field for admin.
<?php

use Illuminate\Database\Migrations\Migration;
use Illuminate\Database\Schema\Blueprint;
use Illuminate\Support\Facades\Schema;

return new class extends Migration
{
    /**
     * Run the migrations.
     *
     * @return void
     */
    public function up()
    {
        Schema::create('users', function (Blueprint $table) {
            $table->id();
            $table->string('name');
            $table->string('email')->unique();
            $table->timestamp('email_verified_at')->nullable();
            $table->string('password');
            $table->tinyInteger('type')->default(0);
            /* Users: 0=>User, 1=>Admin, 2=>Manager */
            $table->rememberToken();
            $table->timestamps();
        });
    }

    /**
     * Reverse the migrations.
     *
     * @return void
     */
    public function down()
    {
        Schema::dropIfExists('users');
    }
};
Next open app/User.php and update the below field name is_admin here:
<?php namespace App\Models; use Illuminate\Contracts\Auth\MustVerifyEmail;use Illuminate\Database\Eloquent\Factories\HasFactory;use Illuminate\Foundation\Auth\User as Authenticatable;use Illuminate\Notifications\Notifiable;use Laravel\Sanctum\HasApiTokens;use Illuminate\Database\Eloquent\Casts\Attribute; class User extends Authenticatable{ use HasApiTokens, HasFactory, Notifiable; /** * The attributes that are mass assignable. * * @var array */ protected $fillable = [ 'name', 'email', 'password', 'type' ]; /** * The attributes that should be hidden for serialization. * * @var array */ protected $hidden = [ 'password', 'remember_token', ]; /** * The attributes that should be cast. * * @var array */ protected $casts = [ 'email_verified_at' => 'datetime', ]; /** * Interact with the user's first name. * * @param string $value * @return \Illuminate\Database\Eloquent\Casts\Attribute */ protected function type(): Attribute { return new Attribute( get: fn ($value) => ["user", "admin", "manager"][$value], ); }}Now, add is_admin filed after that will use the below command for creating this field into the database.
php artisan migrate
Now, create a build-in authentication system. Use the below command for creating the default auth system in laravel. And change laravel build-in auth system to multi auth system
This command will create routes, controllers and views files for Laravel Login Authentication and registration. It means to provide a basic laravel login authentication and registration Complete system. Let’s open the command prompt and type the below command.
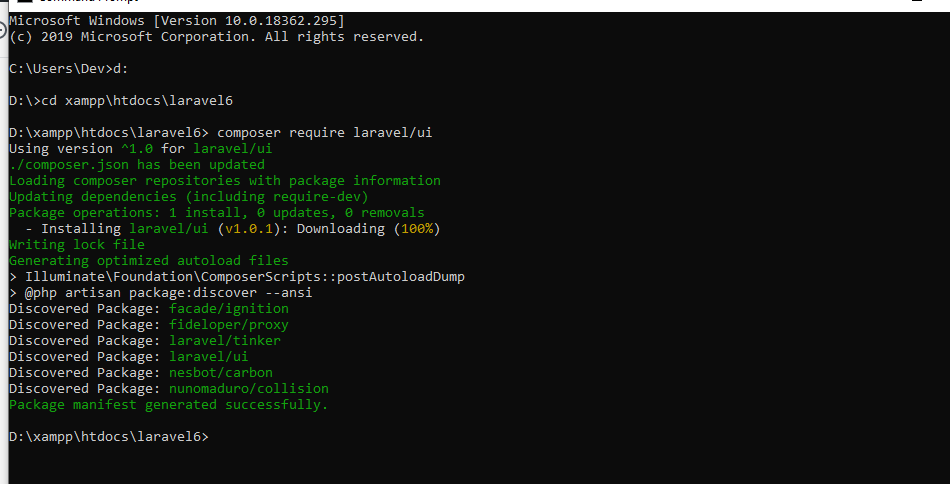
Then install laravel 9 UI in your project using the below command:
composer require laravel/ui
Now, execute the below command on terminal for creating login, registration, forget password and reset password blade files:
php artisan ui bootstrap --auth
Then execute the following commands:
npm install
npm run dev
Step 4: Create Middleware and Setting up
To create a middleware for checking the users. Who can access the admin area or who can access the normal user area.
php artisan make:middleware UserAccess
After creating a middleware go-to app/Http/middleware. Implement the logic here for checking a logged in users. Update the code in this handle function.
<?php namespace App\Http\Middleware; use Closure;use Illuminate\Http\Request; class UserAccess{ /** * Handle an incoming request. * * @param \Illuminate\Http\Request $request * @param \Closure(\Illuminate\Http\Request): (\Illuminate\Http\Response|\Illuminate\Http\RedirectResponse) $next * @return \Illuminate\Http\Response|\Illuminate\Http\RedirectResponse */ public function handle(Request $request, Closure $next, $userType) { if(auth()->user()->type == $userType){ return $next($request); } return response()->json(['You do not have permission to access for this page.']); /* return response()->view('errors.check-permission'); */ }} |
Then register this middleware in the app/Http/Kernel.php. So, open kernal.php and add the following $routeMiddleware property in it:
1 2 3 4 5 6 7 8 9 10 11 12 13 14 | ....protected $routeMiddleware = [ 'auth' => \App\Http\Middleware\Authenticate::class, 'auth.basic' => \Illuminate\Auth\Middleware\AuthenticateWithBasicAuth::class, 'bindings' => \Illuminate\Routing\Middleware\SubstituteBindings::class, 'cache.headers' => \Illuminate\Http\Middleware\SetCacheHeaders::class, 'can' => \Illuminate\Auth\Middleware\Authorize::class, 'guest' => \App\Http\Middleware\RedirectIfAuthenticated::class, 'signed' => \Illuminate\Routing\Middleware\ValidateSignature::class, 'throttle' => \Illuminate\Routing\Middleware\ThrottleRequests::class, 'verified' => \Illuminate\Auth\Middleware\EnsureEmailIsVerified::class, 'user-access' => \App\Http\Middleware\UserAccess::class,];.... |
Step 5: Define Route
Create routes and add it on web.php file as like below.
Open routes/web.php file
<?php

use Illuminate\Support\Facades\Route;

use App\Http\Controllers\HomeController;

/*
|--------------------------------------------------------------------------
| Web Routes
|--------------------------------------------------------------------------
|
| Here is where you can register web routes for your application. These
| routes are loaded by the RouteServiceProvider within a group which
| contains the "web" middleware group. Now create something great!
|
*/

Route::get('/', function () {
    return view('welcome');
});

Auth::routes();

/*------------------------------------------
--------------------------------------------
All Normal Users Routes List
--------------------------------------------
--------------------------------------------*/
Route::middleware(['auth', 'user-access:user'])->group(function () {

    Route::get('/home', [HomeController::class, 'index'])->name('home');
});

/*------------------------------------------
--------------------------------------------
All Admin Routes List
--------------------------------------------
--------------------------------------------*/
Route::middleware(['auth', 'user-access:admin'])->group(function () {

    Route::get('/admin/home', [HomeController::class, 'adminHome'])->name('admin.home');
});

/*------------------------------------------
--------------------------------------------
All Admin Routes List
--------------------------------------------
--------------------------------------------*/
Route::middleware(['auth', 'user-access:manager'])->group(function () {

    Route::get('/manager/home', [HomeController::class, 'managerHome'])->name('manager.home');
})
Step 6: Create Methods in Controller
Now open the HomeController.php file, which is placed on app/Http/Controllers/ directory. Then add the following code into it:
1 2 3 4 5 6 7 8 9 10 11 12 13 14 15 16 17 18 19 20 21 22 23 24 25 26 27 28 29 30 31 32 33 34 35 36 37 38 39 40 41 42 43 44 45 46 47 48 | <?php namespace App\Http\Controllers; use Illuminate\Http\Request; class HomeController extends Controller{ /** * Create a new controller instance. * * @return void */ public function __construct() { $this->middleware('auth'); } /** * Show the application dashboard. * * @return \Illuminate\Contracts\Support\Renderable */ public function index() { return view('home'); } /** * Show the application dashboard. * * @return \Illuminate\Contracts\Support\Renderable */ public function adminHome() { return view('adminHome'); } /** * Show the application dashboard. * * @return \Illuminate\Contracts\Support\Renderable */ public function managerHome() { return view('managerHome'); }} |
Step 7: Create Blade View
Now, create two blade view files first is display home page and second is display after login.
Open the resources/views/home.blade. file and update the below code.
1 2 3 4 5 6 7 8 9 10 11 12 13 14 15 16 17 18 19 20 21 | @extends('layouts.app')@section('content')<div class="container"> <div class="row justify-content-center"> <div class="col-md-8"> <div class="card"> <div class="card-header">Dashboard</div> <div class="card-body"> @if(auth()->user()->is_admin == 1) <a href="{{url('admin/routes')}}">Admin</a> @else <div class=”panel-heading”>Normal User</div> @endif </div> </div> </div> </div></div>@endsection |
Now, I checked the user profile. If it is admin, it will navigate to the admin area. Otherwise, it will redirect to users area.
Create adminHome.blade.php file inside resources/views/ directory and update the following code:
1 2 3 4 5 6 7 8 9 10 11 12 13 14 15 16 17 | @extends('layouts.app') @section('content')<div class="container"> <div class="row justify-content-center"> <div class="col-md-8"> <div class="card"> <div class="card-header">{{ __('Dashboard') }}</div> <div class="card-body"> You are a Admin User. </div> </div> </div> </div></div>@endsection |
Create managerHome.blade.php file inside resources/views/ directory and update the following code:
1 2 3 4 5 6 7 8 9 10 11 12 13 14 15 16 | @extends('layouts.app')@section('content')<div class="container"> <div class="row justify-content-center"> <div class="col-md-8"> <div class="card"> <div class="card-header">{{ __('Dashboard') }}</div> <div class="card-body"> You are a Manager User. </div> </div> </div> </div></div>@endsection |
Step 8: Update on LoginController
Update methods in loginController, so go to app/Http/Controllers/Auth/ and open loginController.php file and add the following code into it:
1 2 3 4 5 6 7 8 9 10 11 12 13 14 15 16 17 18 19 20 21 22 23 24 25 26 27 28 29 30 31 32 33 34 35 36 37 38 39 40 41 42 43 44 45 46 47 48 49 50 51 52 53 54 55 56 57 58 59 60 61 62 63 64 65 66 | <?php namespace App\Http\Controllers\Auth; use App\Http\Controllers\Controller;use App\Providers\RouteServiceProvider;use Illuminate\Foundation\Auth\AuthenticatesUsers;use Illuminate\Http\Request; class LoginController extends Controller{ /* |-------------------------------------------------------------------------- | Login Controller |-------------------------------------------------------------------------- | | This controller handles authenticating users for the application and | redirecting them to your home screen. The controller uses a trait | to conveniently provide its functionality to your applications. | */ use AuthenticatesUsers; /** * Where to redirect users after login. * * @var string */ protected $redirectTo = RouteServiceProvider::HOME; /** * Create a new controller instance. * * @return void */ public function __construct() { $this->middleware('guest')->except('logout'); } public function login(Request $request) { $input = $request->all(); $this->validate($request, [ 'email' => 'required|email', 'password' => 'required', ]); if(auth()->attempt(array('email' => $input['email'], 'password' => $input['password']))) { if (auth()->user()->type == 'admin') { return redirect()->route('admin.home'); }else if (auth()->user()->type == 'manager') { return redirect()->route('manager.home'); }else{ return redirect()->route('home'); } }else{ return redirect()->route('login') ->with('error','Email-Address And Password Are Wrong.'); } }} |
Step 9: Create Seeder
Run the following command on terminal to create seeders; is as follows:
php artisan make:seeder CreateUsersSeeder
Then visit to database/seeders/ directory and open CreateUsersSeeder.php. And add the following code into it:
<?php

namespace Database\Seeders;

use Illuminate\Database\Console\Seeds\WithoutModelEvents;
use Illuminate\Database\Seeder;
use App\Models\User;

class CreateUsersSeeder extends Seeder
{
    /**
     * Run the database seeds.
     *
     * @return void
     */
    public function run()
    {
        $users = [
            [
               'name'=>'Admin User',
               'email'=>'admin@tutsmake.com',
               'type'=>1,
               'password'=> bcrypt('123456'),
            ],
            [
               'name'=>'Manager User',
               'email'=>'manager@tutsmake.com',
               'type'=> 2,
               'password'=> bcrypt('123456'),
            ],
            [
               'name'=>'User',
               'email'=>'user@tutsmake.com',
               'type'=>0,
               'password'=> bcrypt('123456'),
            ],
        ];

        foreach ($users as $key => $user) {
            User::create($user);
        }
    }
}
Execute the following command on terminal to seed from seeders; is as follows:
php artisan db:seed --class=CreateUsersSeederStep 10: Run development server
Now, start the development server using the below command and test our laravel multi user role based auth system:
php artisan serve


